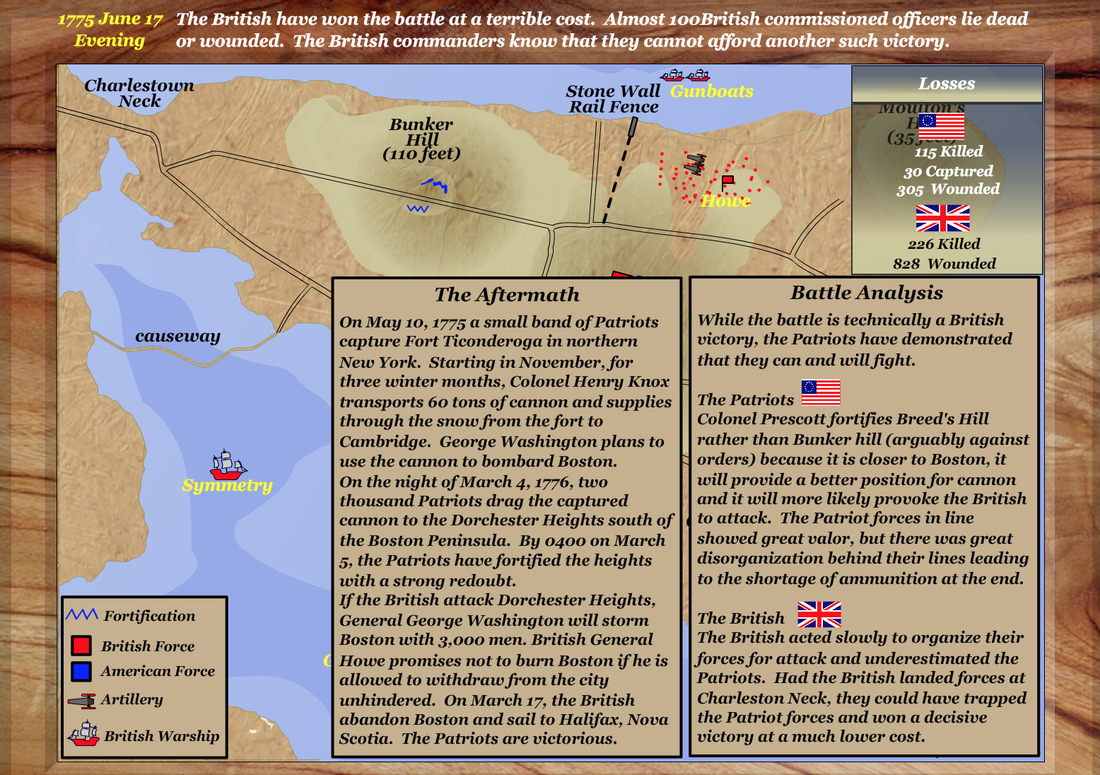
Battle of Bunker Hill - 12 Diagram
Por um escritor misterioso
Last updated 12 maio 2024


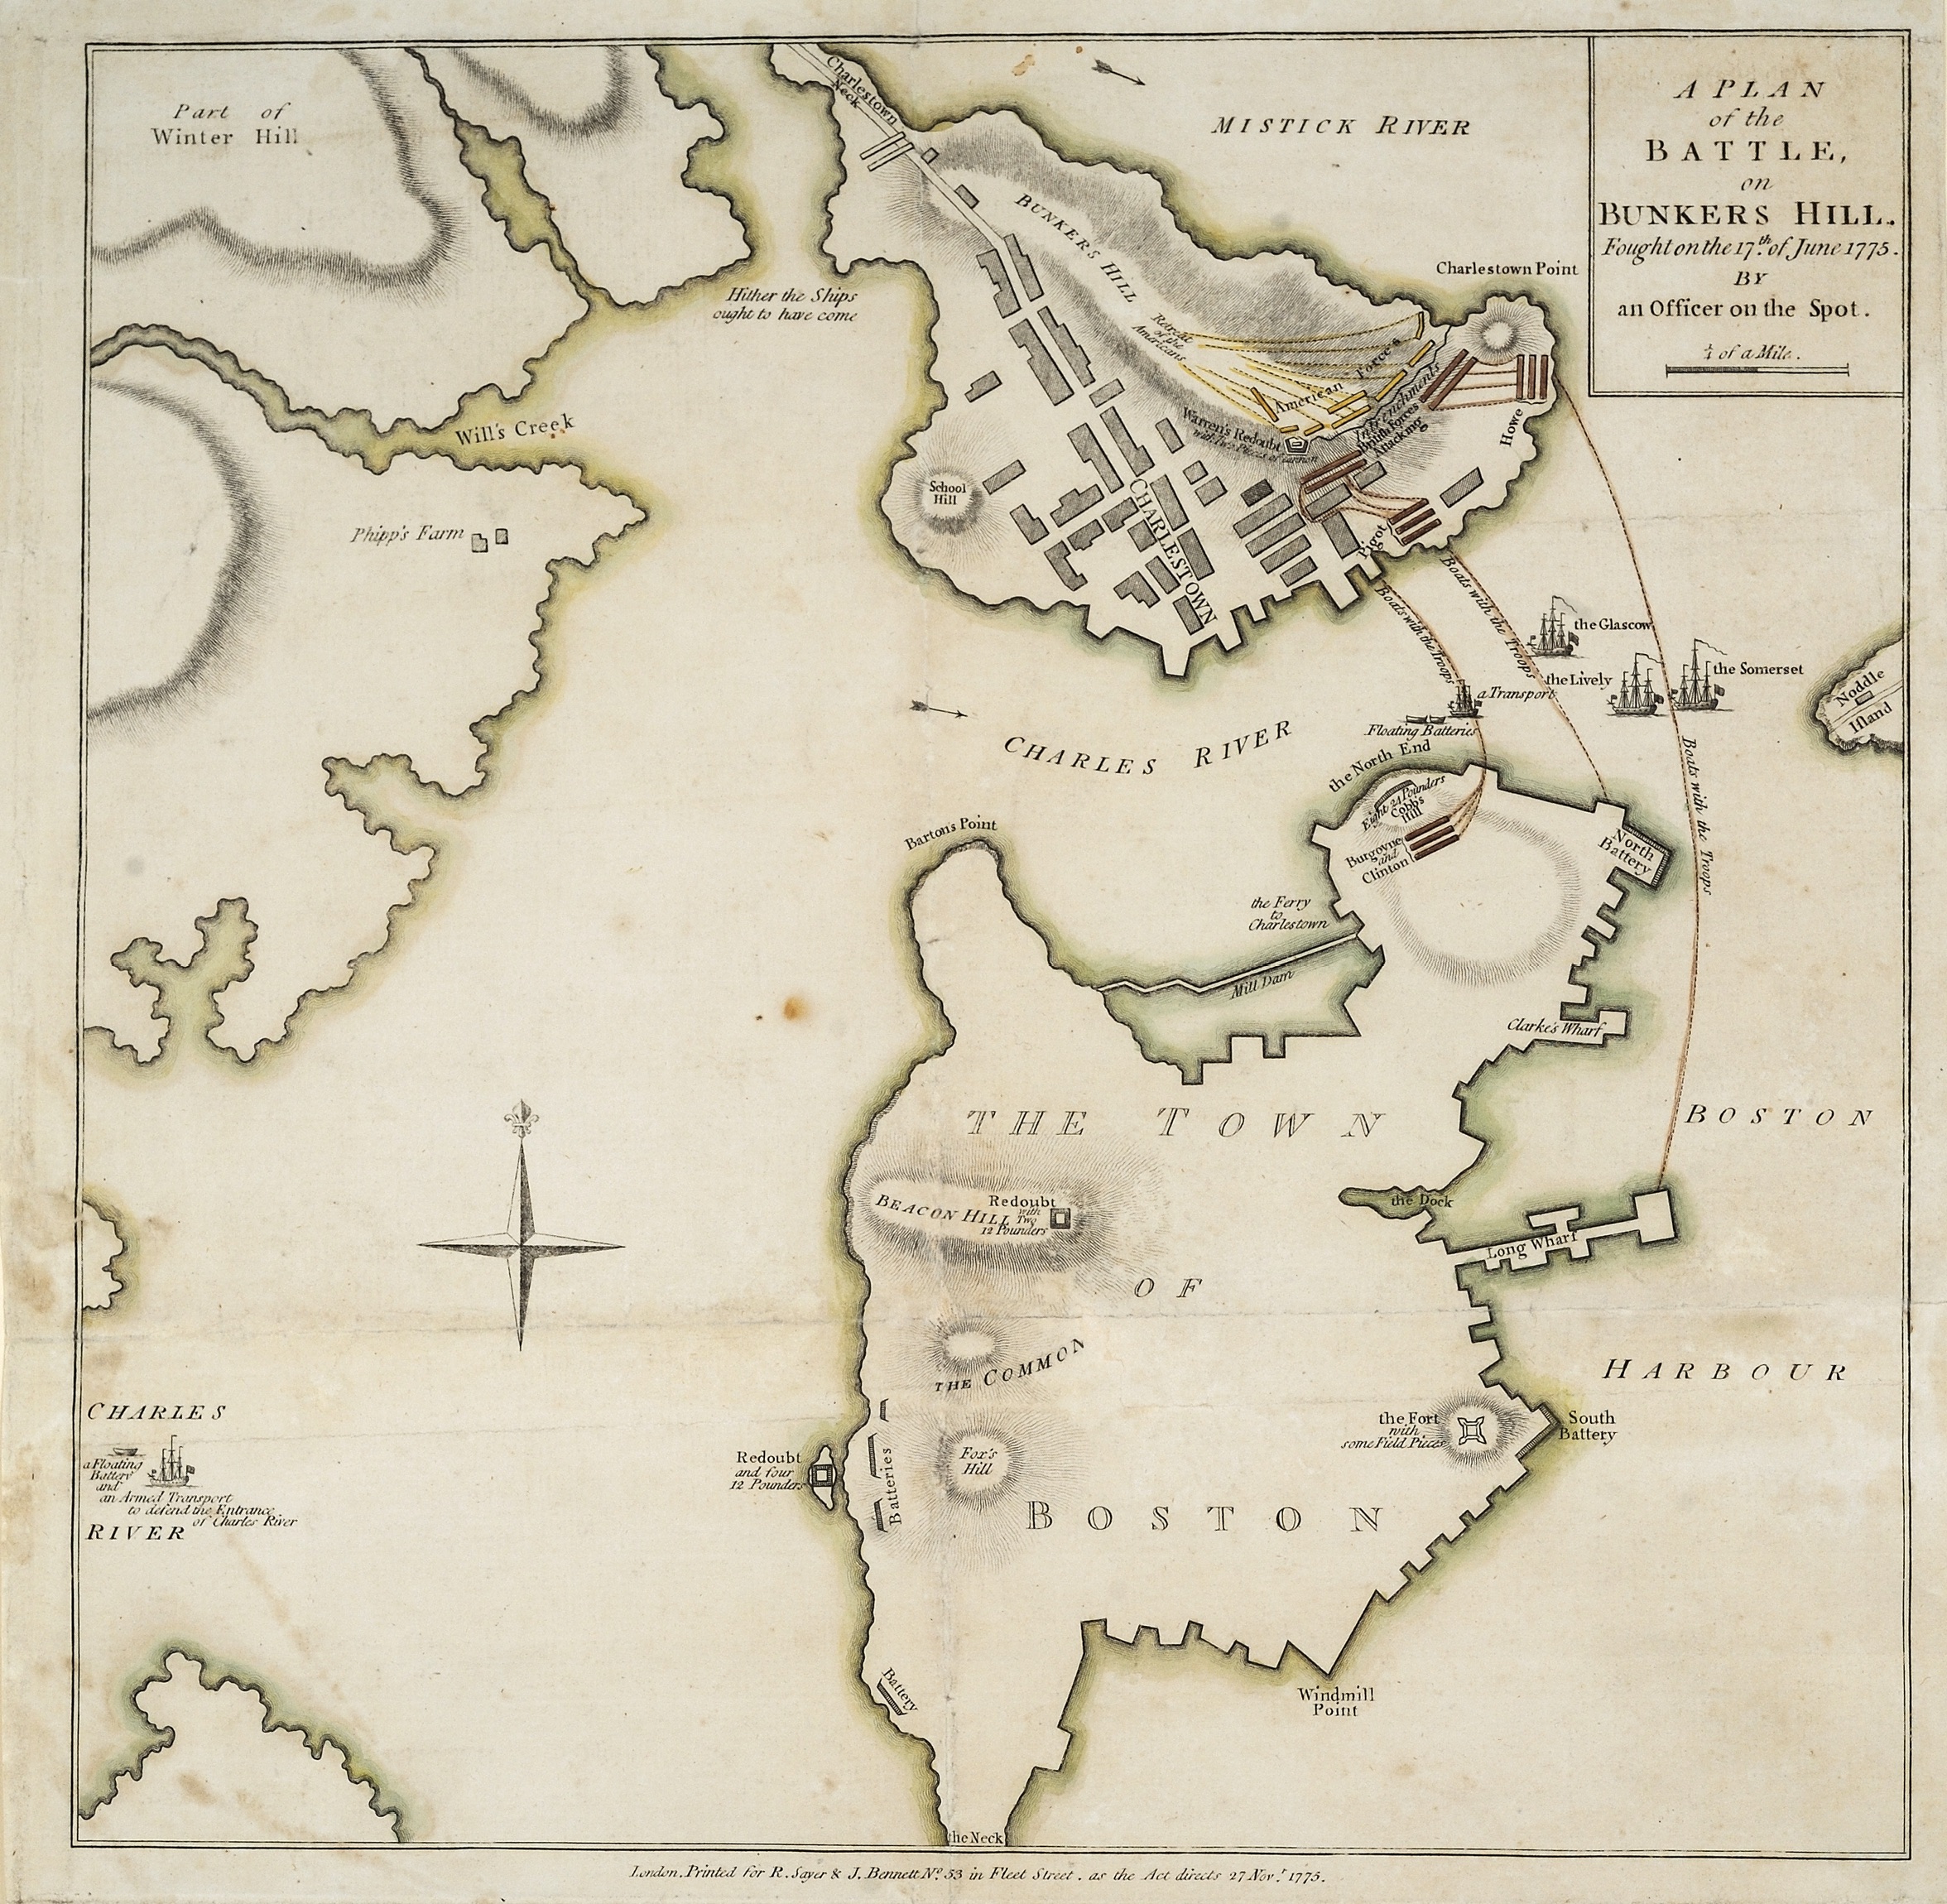
The de Costa map: “The first published map of the first battle” of the American Revolution (Nebenzahl) - Rare & Antique Maps
American Revolution Notes Assignment - Bradfield's Class

Battle of Bunker Hill - Wikipedia

File:Opgraving Romeinse villa Backerbosch, plattegrond Habets, 1881.jpg - Wikimedia Commons
Hugh Fellers Rd, Prosperity, SC 29127, MLS #572715

Dawn of Independence – printed charts and views of the Battle of Bunker Hill, from the chart and map collections

Digital Collection Spotlight #40: Labrador « Moravian Archives
Imagining the Battle of Bunker Hill - The American Revolution Institute

Finding Fort Bunker Hill – Bygone Brookland

Bunker Hill: A City, a Siege, a Revolution by Nathaniel Philbrick

Battle of Bunker Hill Reading Comprehension Worksheet American Revolution

Battle at Bunker's Hill, 17 June 1775 (No. 1)
The Battle of Bunker Hill

Battle of Bunker Hill by Ali virk
Recomendado para você
-
 Hill12 maio 2024
 -
 Reliving Windows XP Bliss Wallpaper in High Definition12 maio 2024
 -
 Word of the Week: Hill Sphere - OSIRIS-REx Mission12 maio 2024
 -
 Landform - Easy Science Landforms, Earth surface, Science flashcards12 maio 2024
 -
 HILL meaning, definition & pronunciation, What is HILL?12 maio 2024
 -
 HILL WALKING - Definition and synonyms of hill walking in the English dictionary12 maio 2024
 -
 The House on the Hill by Edwin Arlington Robinson - Poem Analysis12 maio 2024
 -
 hill synonyms, antonyms and definitions, Online thesaurus12 maio 2024
 -
 Bobby Hill High Definition Graphic · Creative Fabrica12 maio 2024
 -
 Yoshi sitting on a hill, high definition12 maio 2024
você pode gostar
-
 pinterest fashion in 2023 Pinterest fashion, Fashion, Y2k style12 maio 2024
 -
Por que você acredita tanto em mim? - Hajimete No Gal BR12 maio 2024
-
 Bugatti Guitar Clock Desk Collection S4-7544/ OR Guitars Rare12 maio 2024
 -
 Pokemon Rengoku Oni Giri12 maio 2024
 -
 10 Marketing Blunders That Will Make You Laugh (And Glad It Wasn't You)12 maio 2024
 -
 Initial D First Stage Sound Files, Volume 2 - comprar mp3, todas las canciones12 maio 2024
 -
 Plants vs Zombies: Fan Version 🔥 Play online12 maio 2024
 -
 pdfcoffee.com_tle-carpentry-dll-pdf-free.pdf12 maio 2024
 -
 38 Ropey Synonyms. Similar words for Ropey.12 maio 2024
 -
 Card APK Download 2023 - Free - 9Apps12 maio 2024
